Setup Instructions
Here are instructions on how to setup the Glow Booth. We have a video guide which is followed by written instructions.
Video Instructions
This 5 minute video provides a quick rundown of how to setup your Glow Booth.
We recommend to watch it before coming to collect your booth so that you can ask any questions when you collect.
Written Instructions
Preparation
- IDENTIFY a suitable location for setup of the photobooth.
- A space approximately 2.5 x 2.5 meters.
- Somewhere for backdrop to go, generally against a wall is best.
- Nearby access to a power point.
Backdrop Setup
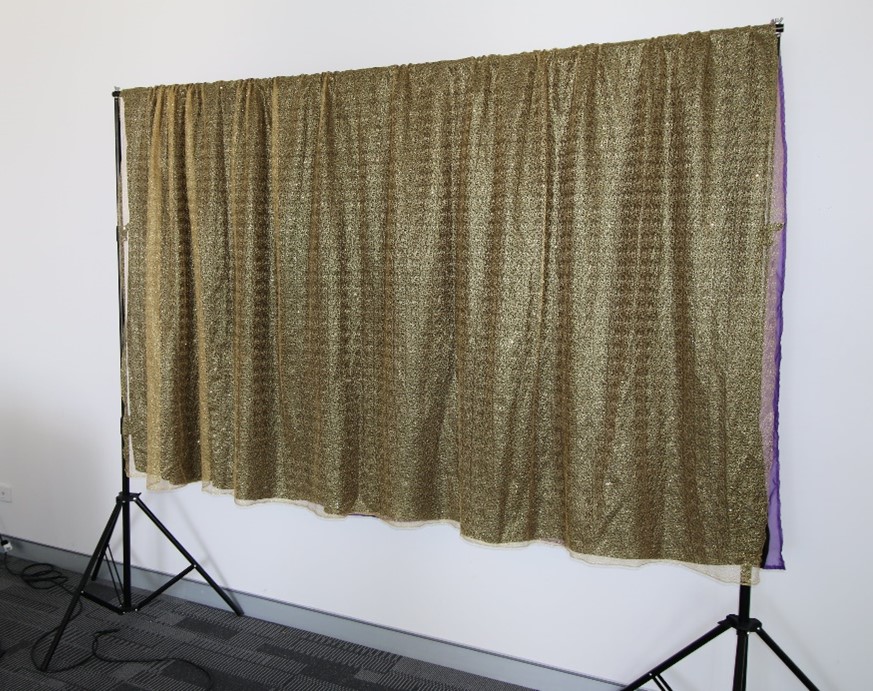
UNFOLD the legs of the two backdrop tripod stands and tighten thumb screw. Legs should be at approximately 45 degrees to the ground.
JOIN the three backdrop rod sections, ensuring the big slotted holes are at each end of the pole.
SLIDE the backdrop fabric loop onto the backdrop rod.
PLACE the backdrop rod onto the two backdrop tripods.
RAISE the telescopic backdrop tripods (using the thumb screws) so that the backdrop is at the desired height (approx. 2m from floor to top of backdrop).
Booth Setup
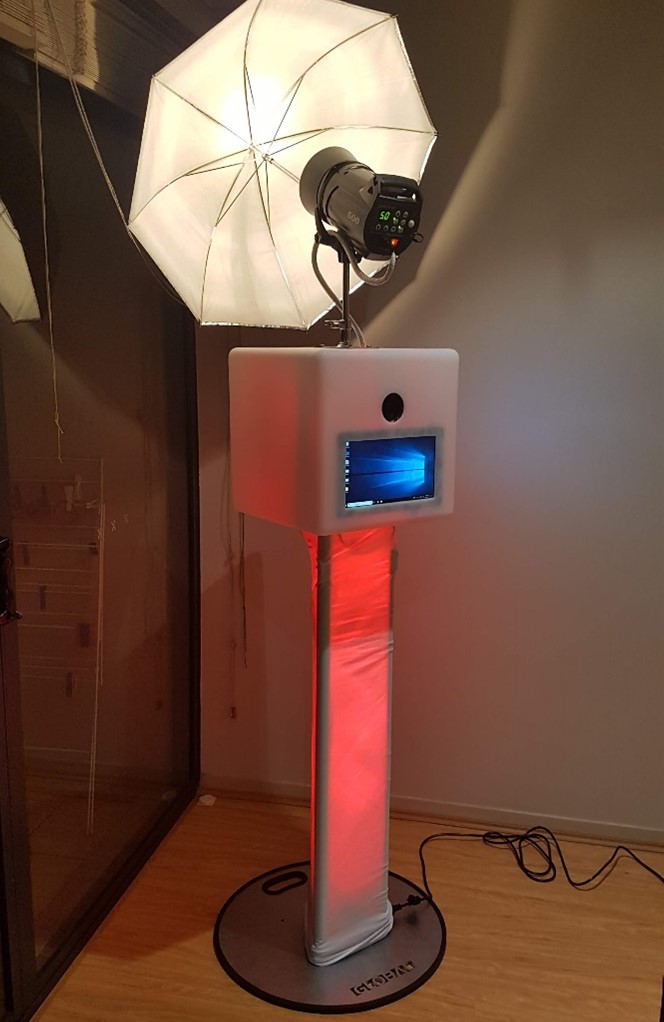
PLACE the base plate approximately 1.5 meters in front of the backdrop.
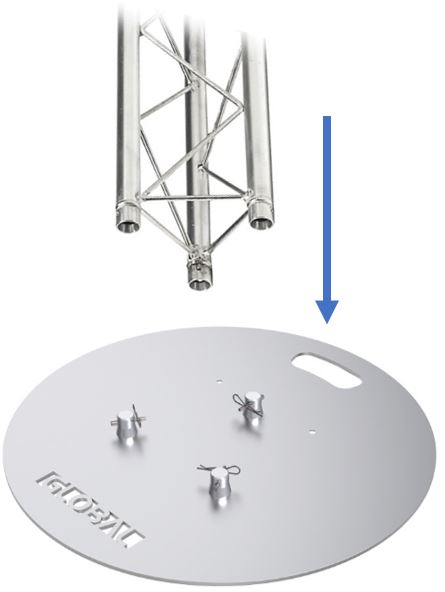
JOIN the 1 m long metal truss to the three spigots on the base plate.
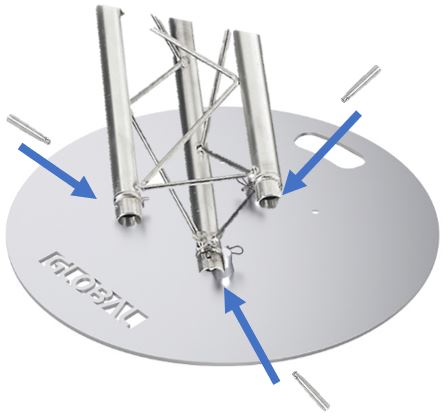
HAMMER in the three locking pins to secure the main metal truss to the base plate.
PLACE the white scrim fabric over the truss, this will be used to cover the trussing and provide the lighting effect.
JOIN the photo booth box unit to the top of the main metal truss.
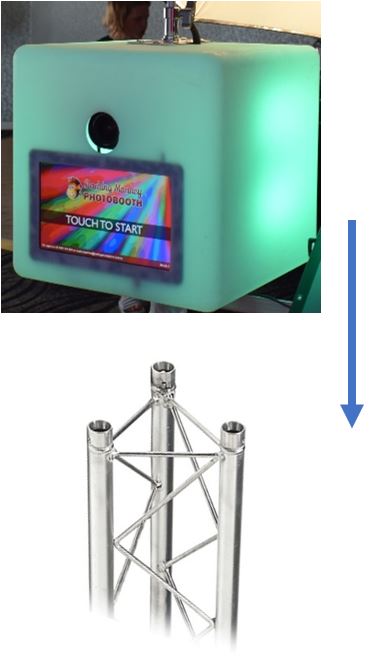
HAMMER in the three locking pins at the top of the main truss to secure the photo booth box to the main metal truss.
PLUG IN the cable from the photo booth box unit into the extension cord on the main metal truss.
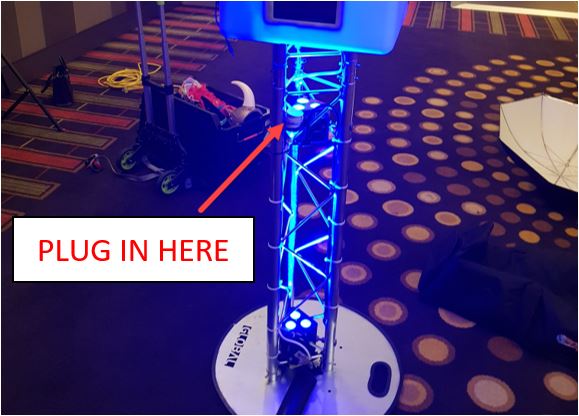
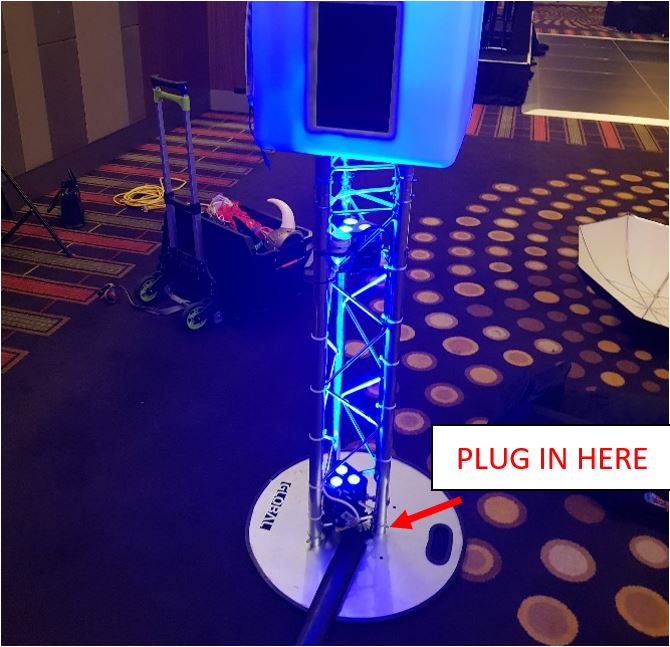
PLUG IN the cable from the base of the metal truss to a nearby general power outlet.
Flash Setup
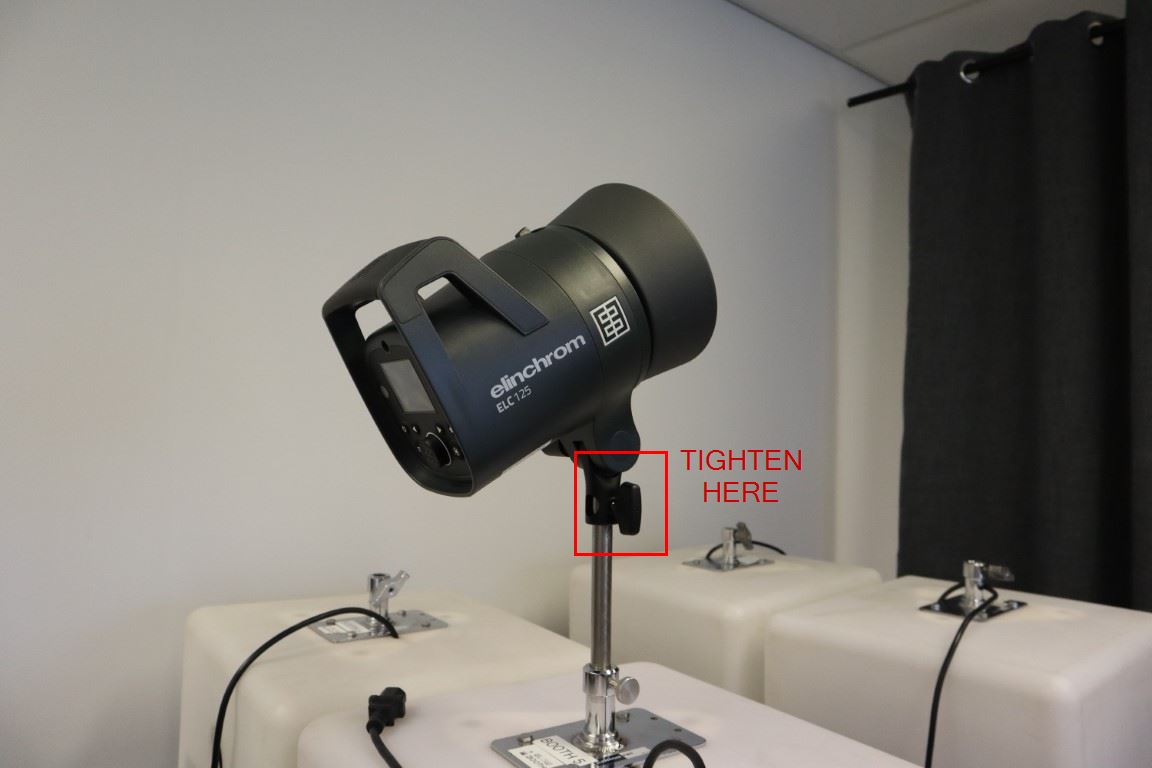
CONNECT the small metal pole to the metal hole on the top of the photo booth. TIGHTEN the locking screw until firm but take care not to over-tighten.
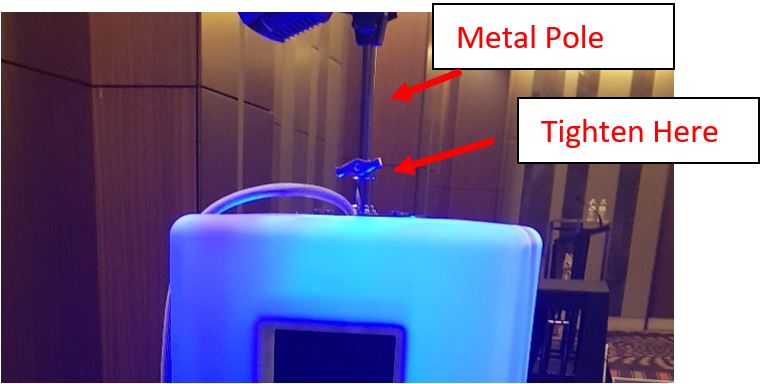
CONNECT the flash unit to the top of the small metal pole. Flash globe should be pointing away from the backdrop. Tighten the flash unit to the pole again taking care not to over-tighten.
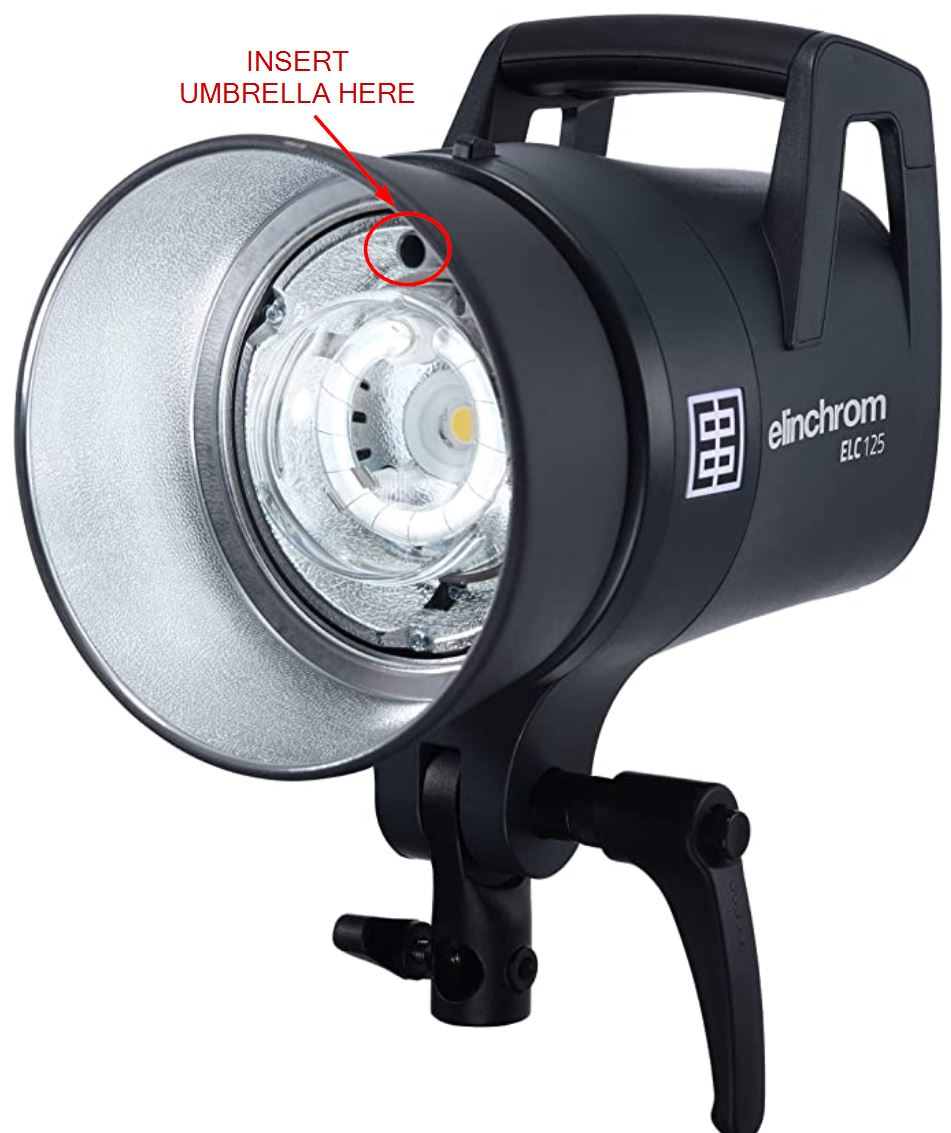
Gently INSERT the umbrella into the small hole on the front of the flash unit. Insert until tight.
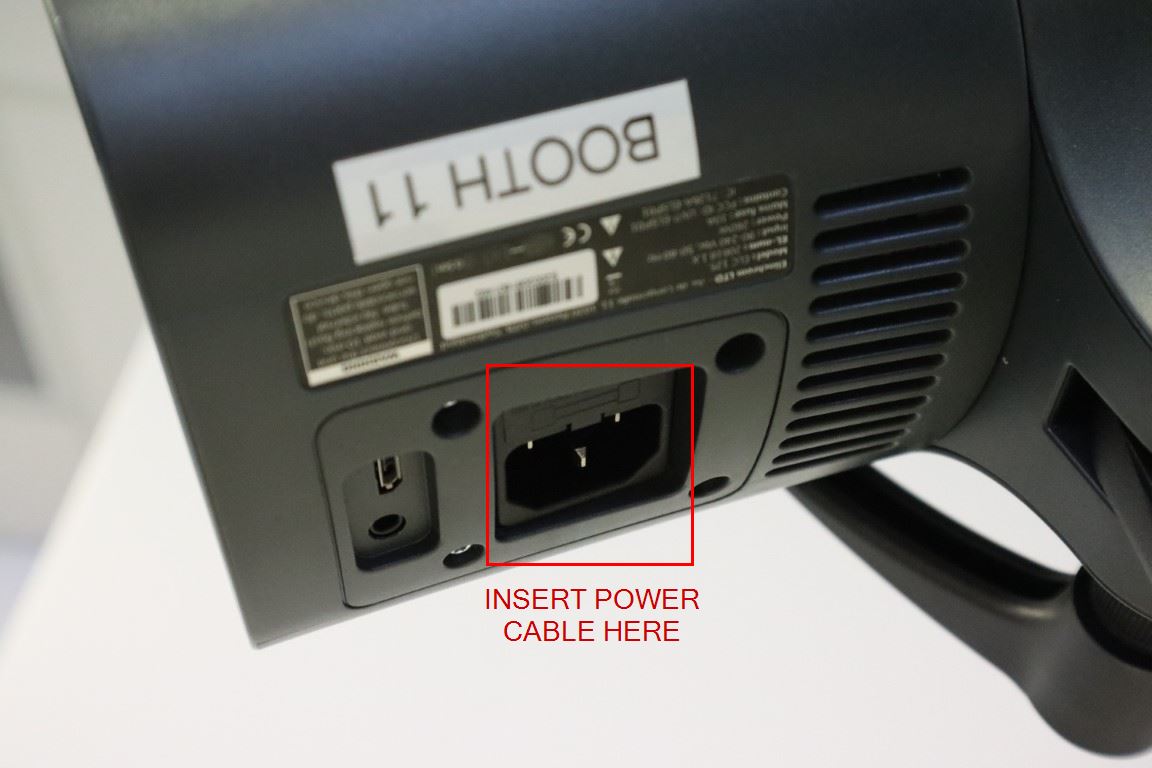
CONNECT the power cable from the photo booth unit to the flash unit. The flash unit should automatically turn on, but if not you can press the power button to turn it on.
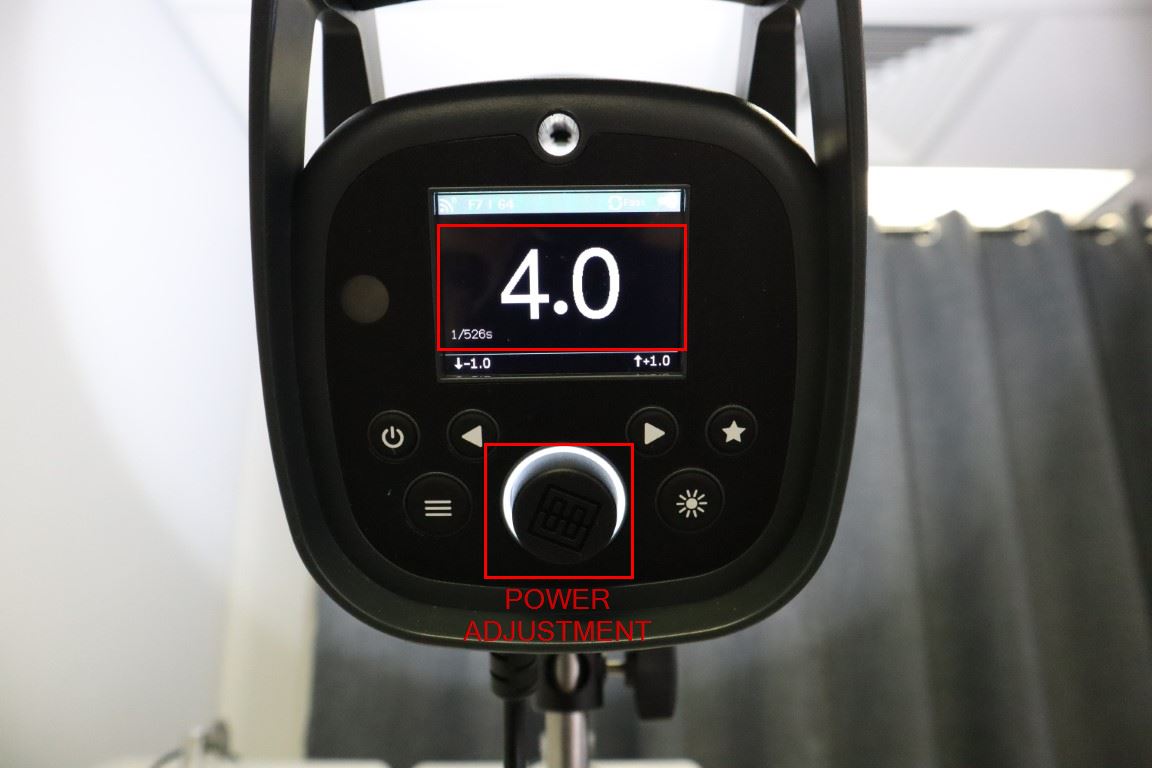
SET the flash power to "4.0" using the dial. Once you take some test photos, you can adjust this up or down to adjust the photo brightness if required. For events outside with the booth in the sun, you may need to reduce the flash power.
Cabling
INSTALL black rubber cable covers, by squeezing open from underneath and placing cable inside.
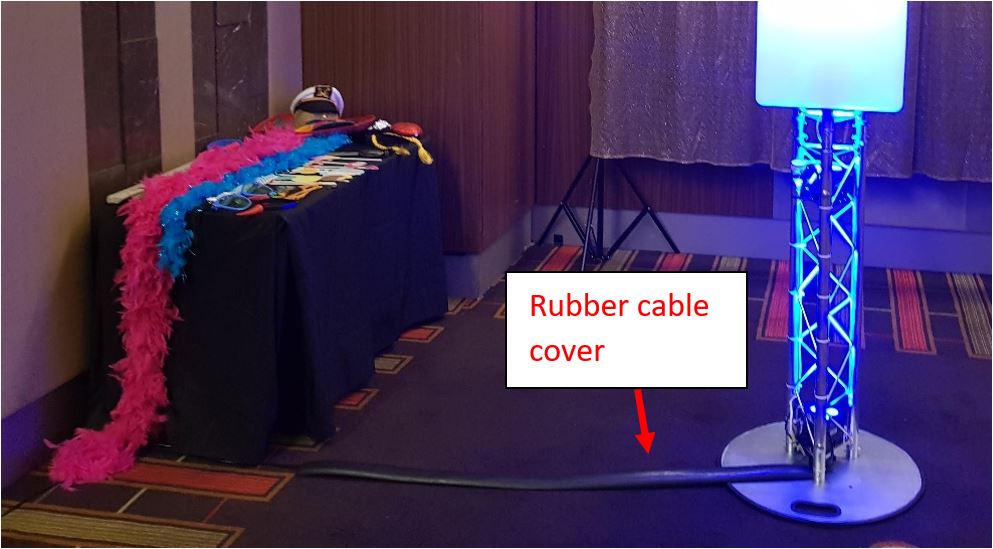
ROUTE power cables neatly, ensuring no potential tripping hazards.
Props Setup
UNFOLD and setup the portable trestle table. Raise to the desired height.
PLACE tablecloth over the trestle table.
ARRANGE props as desired on the table.
PLACE props table in desired location.
Switch On
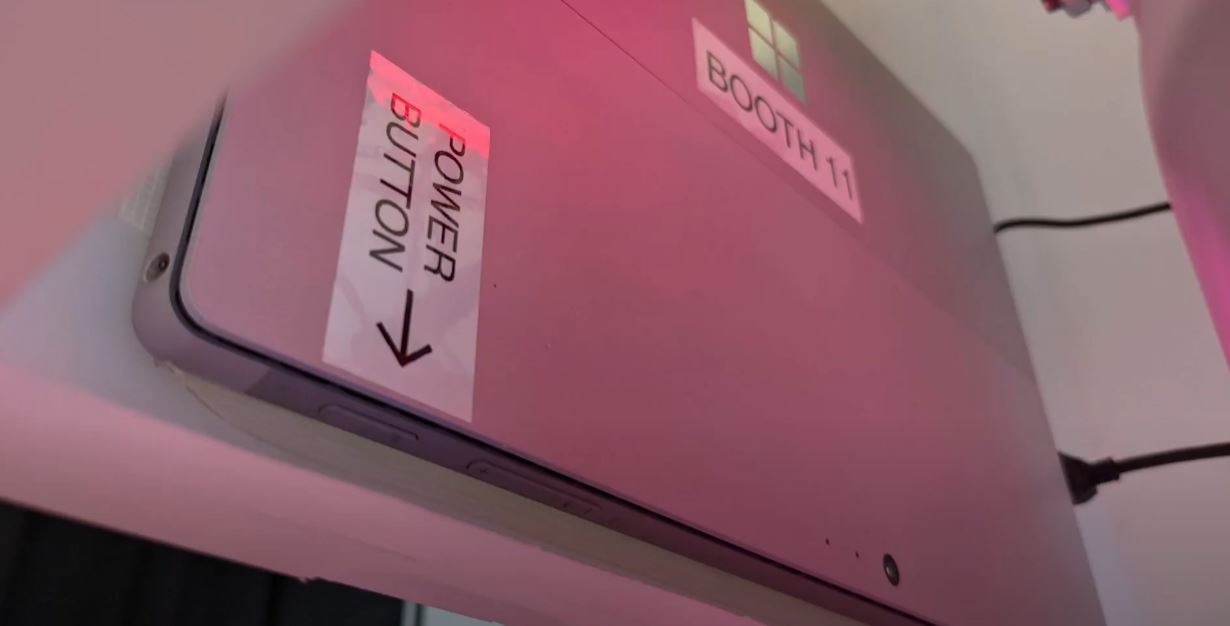
PRESS the power button on the main tablet. This is located inside the booth, on the bottom edge of the main tablet (silver button). Tablet should start to power on.
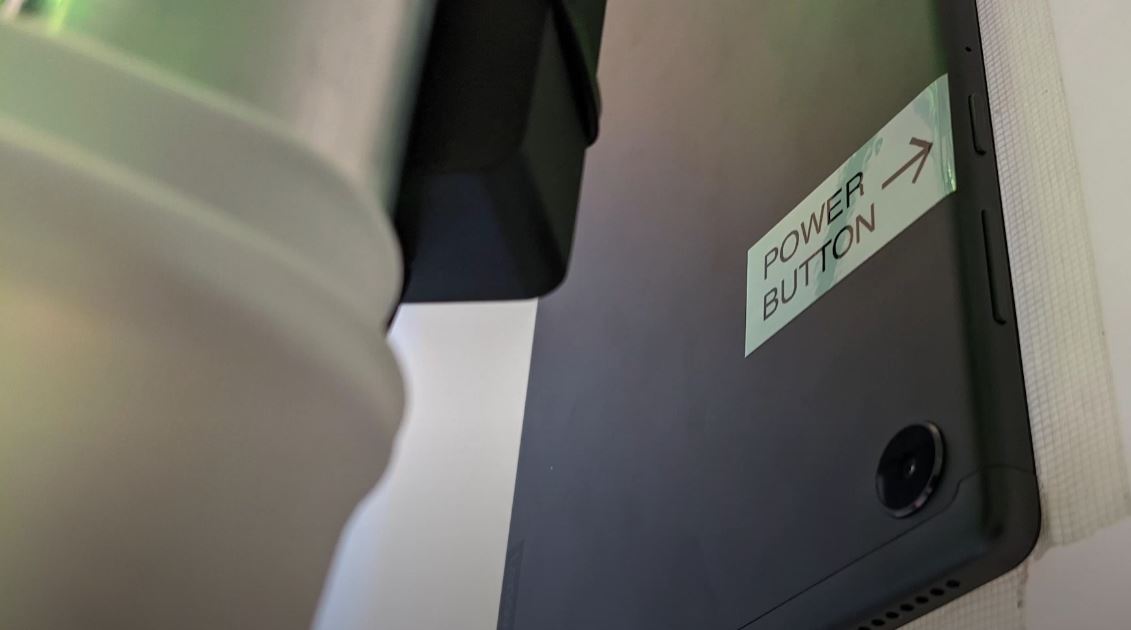
PRESS the power button on the side tablet. This is located inside the booth, on the side edge of the side tablet. Tablet should start to power on.
WAIT for the tablets to turn on and self-configure (few minutes).
TAKE some test photos and ensure that the backdrop fully covers the photo frame. Adjust position of the booth or backdrop if necessary.
SEND a test SMS to your own number by inputting your phone number into the side tablet.